Make Canon IJ Setup Easy With IJ Setup Canon
Canon is in the game for years and has maintained its position as one of the top printer brands for a long time now. The reasons for the success are quite obvious. With the new Inkjet printer technology too, Canon has taken up the printing game. It offers many user-friendly features such as wireless connectivity, affordable printing, convenient setup, and amazing printing quality. To start enjoying these amazing features of the Canon IJ printer you have to first set up the IJ printer. Canon IJ setup is not a complicated task, it involves a few easy steps and you’re done with the setup. Visit the ij setup canon and find the easy guidelines for your IJ printer setup.
Perfect Guide To Canon IJ Printer Setup:-
Canon IJ printers are in high demand and so many people need help in setting them up. To set up the Canon printer do as instructed.
- Start with unboxing the Canon printer and start removing all the tapes and plastic packaging from the printer.
- Remove any orange tapes from the printer and discard them all.
- Now, install the print head by opening the print head locking cover and take off the protective tape.
- To the left side, install the colored print head.
- For the black colored print head, repeat the same steps as done for the installation of the colored print head.
- After installing the print heads, very carefully close the print head locking cover by firmly pressing it down until you hear a click sound. Press the joint buttons too, until you hear a click sound.
- Now, close the scanning unit cover too.
- After that switch on the power button to turn on the printer.
- A prompt asking for language confirmation will come on your screen, open that, click to select your language, and confirm ok.
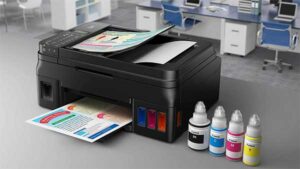
- Now, move ahead with pouring ink in the ink bottles.
- To start pouring ink, initially, you have to open the scanning unit cover again and then open the tank cap on the left side for pouring the black ink.
- Make sure that the ink tip is properly fitted into the ink tank and hold it upright. Twist and open the cap to start pouring it.
- Once you have filled the ink, discard the ink bottles and close the tank cap.
- Attempt the same steps for pouring colored inks into their respective ink tanks.
- Proceed with the ink preparation system after closing the scanning cover unit.
- Then you have to load an LTR or a plain A4-sized sheet into the input tray.
- Open the feed slot cover by taking out the paper support and shift the right paper guide to the edge.
- Place the paper by facing down the printing side.
- After that make suitable adjustments to the right paper guide.
- Shut down the feed slot cover and open the output tray extension.
- That’s it! Your Canon IJ printer is ready to use.
Bingo!

After the above-mentioned easy steps, the Canon IJ setup is complete. IJ setup canon
helps in making it an easy task. Just open the website and start with
the step-by-step guide. The canon is now everyone’s choice because of so
many user-friendly options. The most liked one being the cost-effective
side of the printer. It is affordable as well as does high-volume
printing. Just a setup away from enjoying the cost-effective printing
and you are done!


Comments
Post a Comment